Ooh, the excitement is getting too much now…
Isn’t it funny how you always assume working in the garden is easy?
Next time I decide to have a bright idea, please someone just slap me!
The amount of work put into this border is beyond imagination, I ought to have seen it coming but my lack of experience didn’t ever prepare me for what would lie ahead.
My plans to extend other borders may now never happen, I don’t think I’ll be trying for a while yet…
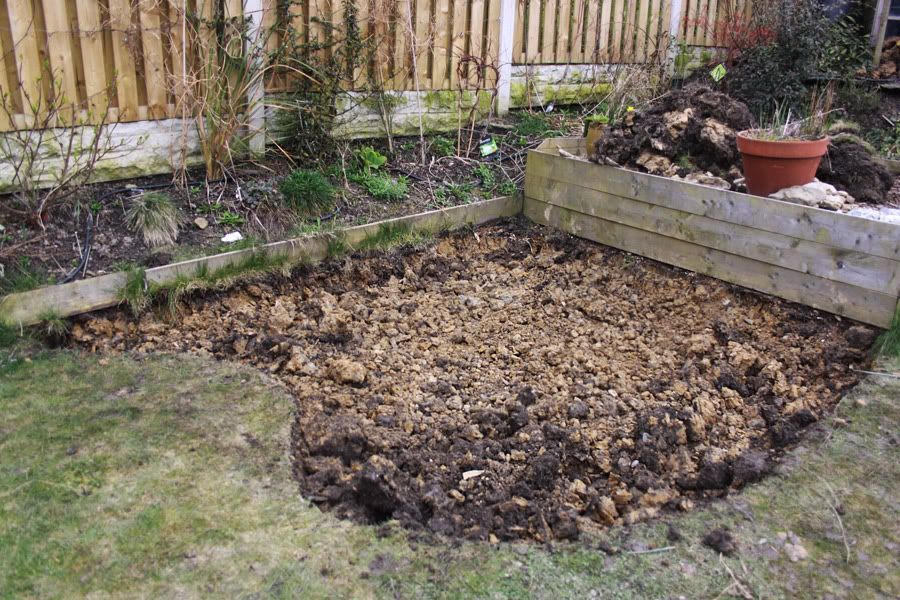
Once digging it soon became obvious this wasn't a case of breaking up the clay, allowing to dry and then mixing with improver/top soil/sand, there was just too much. The most sensible option is to remove as much clay as possible... Easier said than done without the aid of a skip!
04th April
Isn’t it funny how you always assume working in the garden is easy?
Next time I decide to have a bright idea, please someone just slap me!
The amount of work put into this border is beyond imagination, I ought to have seen it coming but my lack of experience didn’t ever prepare me for what would lie ahead.
My plans to extend other borders may now never happen, I don’t think I’ll be trying for a while yet…
Once digging it soon became obvious this wasn't a case of breaking up the clay, allowing to dry and then mixing with improver/top soil/sand, there was just too much. The most sensible option is to remove as much clay as possible... Easier said than done without the aid of a skip!
04th April
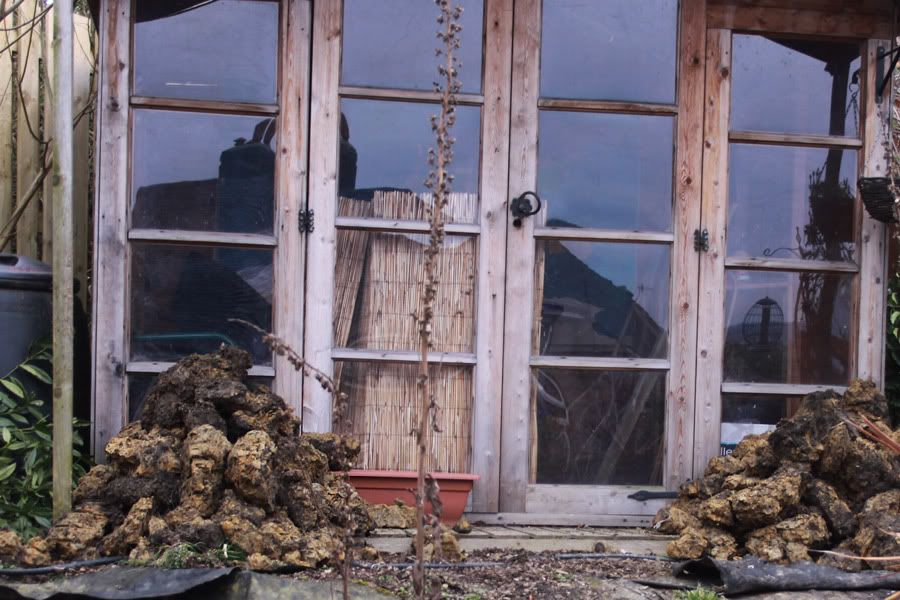
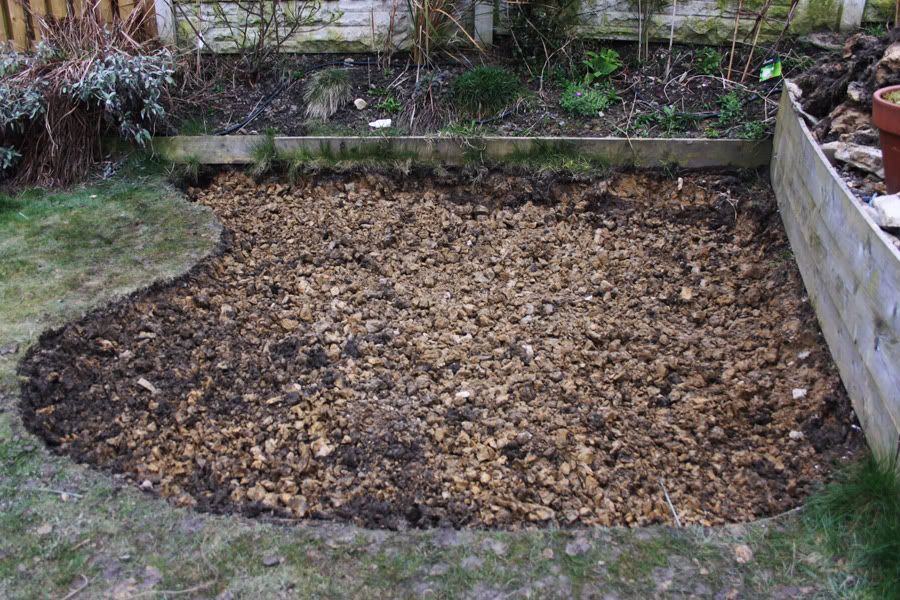
Taken on Sunday after I’d done some work removing some of the clay and bagged it up.
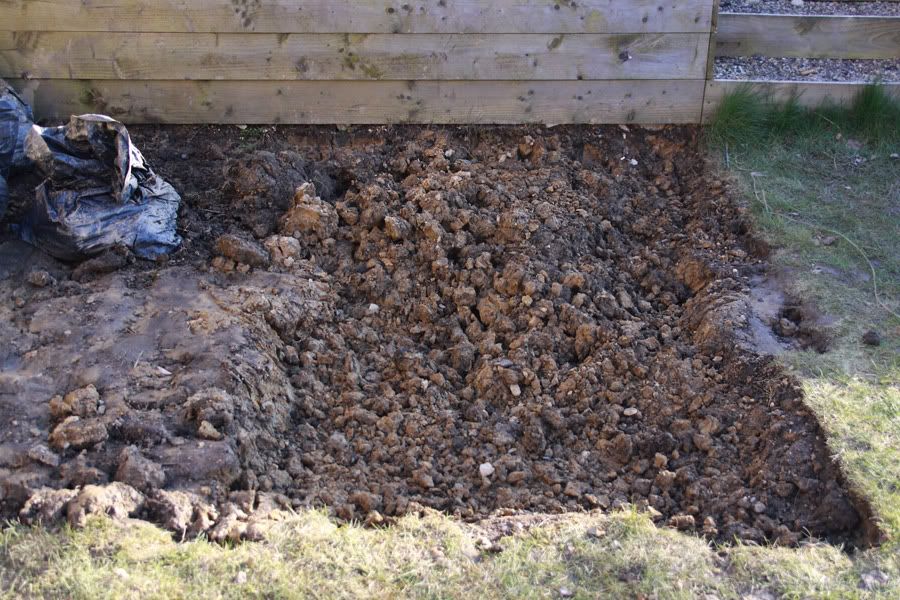
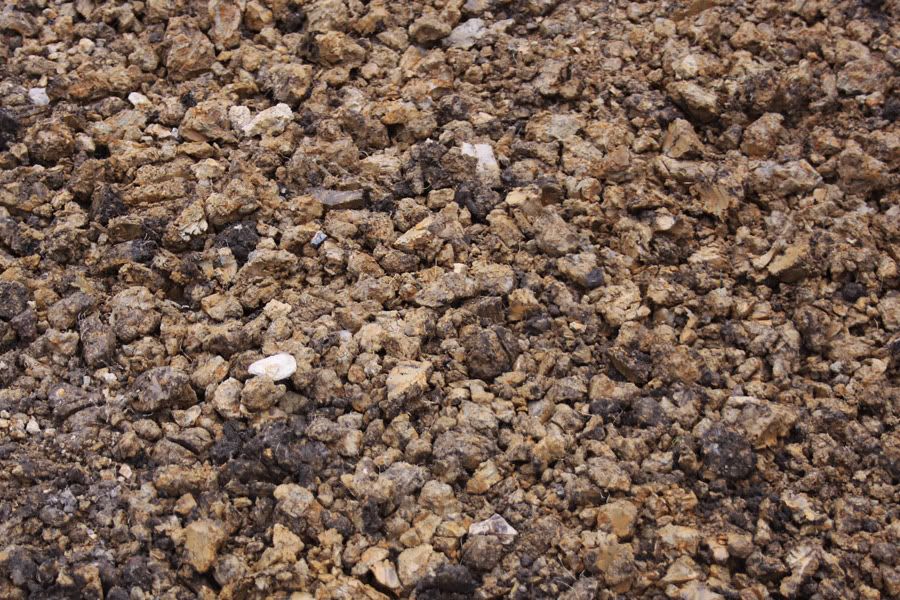
A closer shot of the clay clumps, it’s impossible to work with.
The main area is dug, and most large clumps are removed.
Tuesday I put the finishing touches to the bed, it should now be ready for the fun part; adding the topsoil and sand for drainage.
06th April
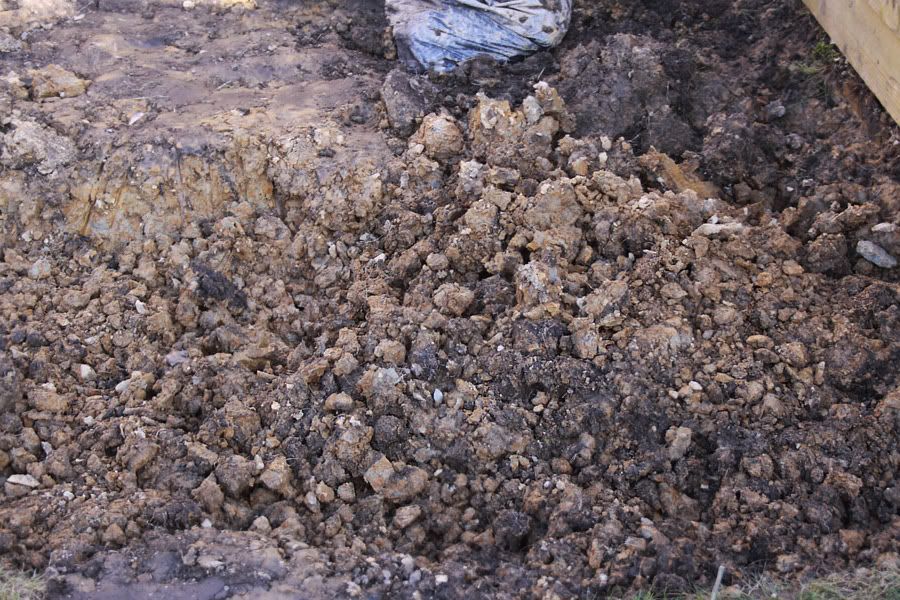
See what I mean about the clay?? I kid you not.
Is there anything else I could use all this clay for? It seems like such a waste simply throwing it in the bin...
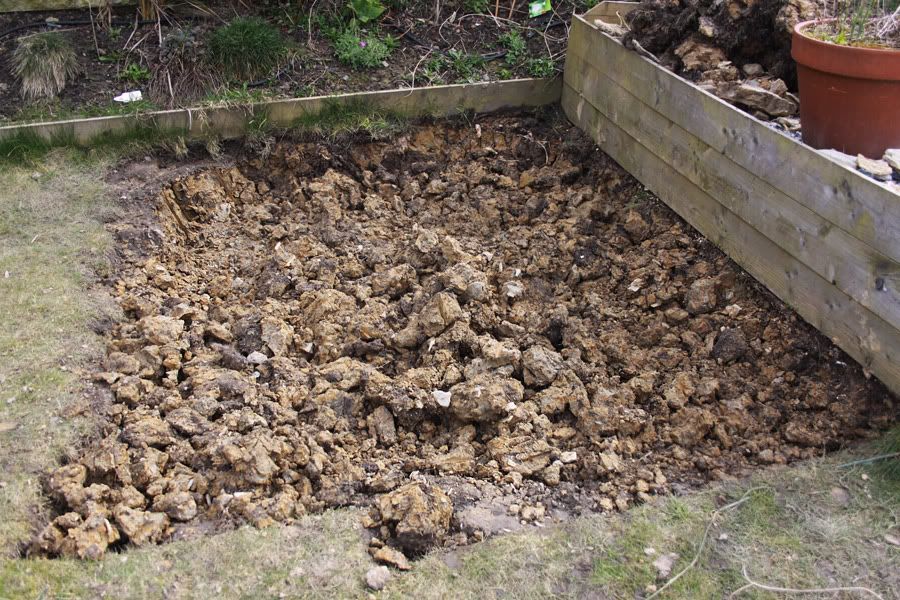
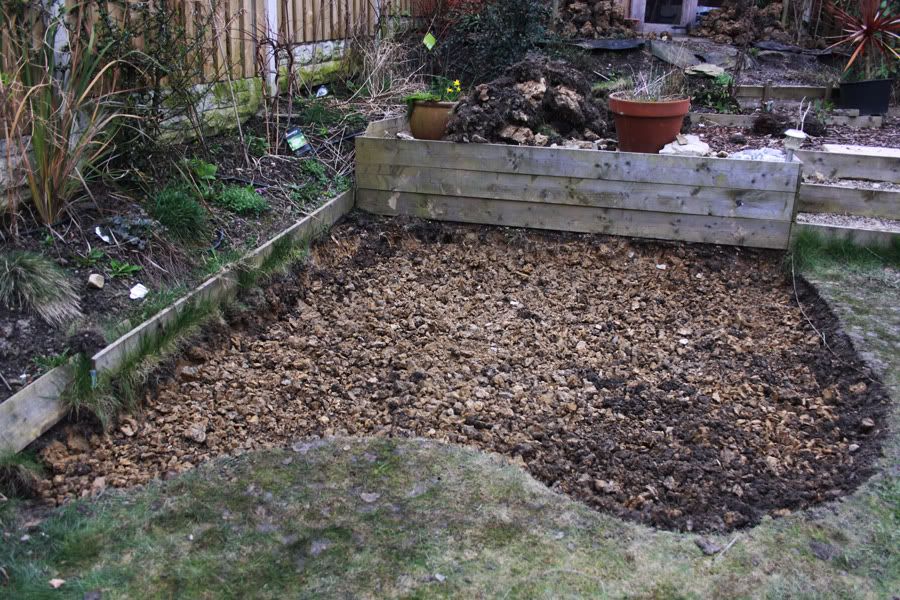
After a break to allow the clay to dry out, I cut the shape to the border and set to work again.

The entire shape is now ready. Once again I allowed the clay to dry before cutting at it with a hoe and lawn edger.
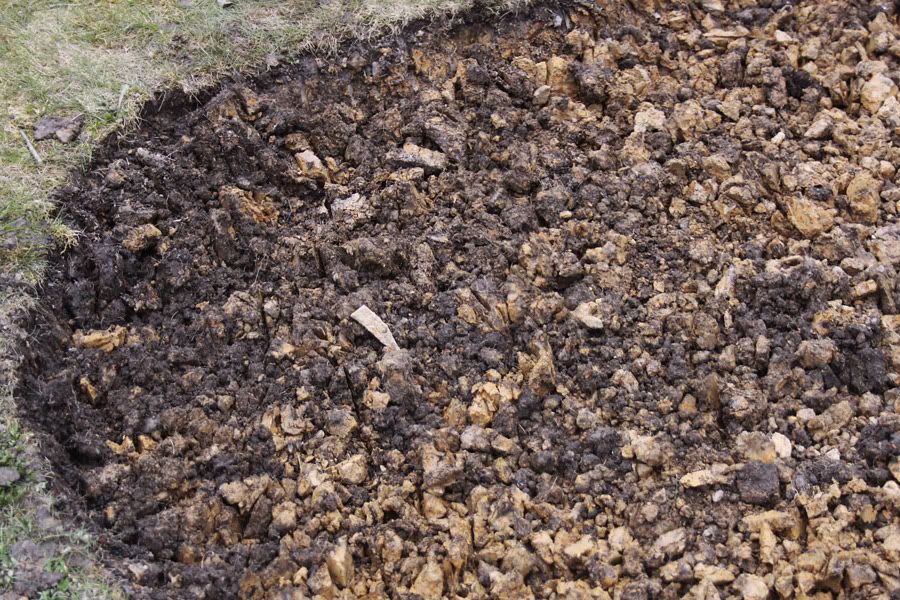
Here the lumps are still fairly large, although not too bad, to the left you can see we’re finally hitting real soil with very little clay.

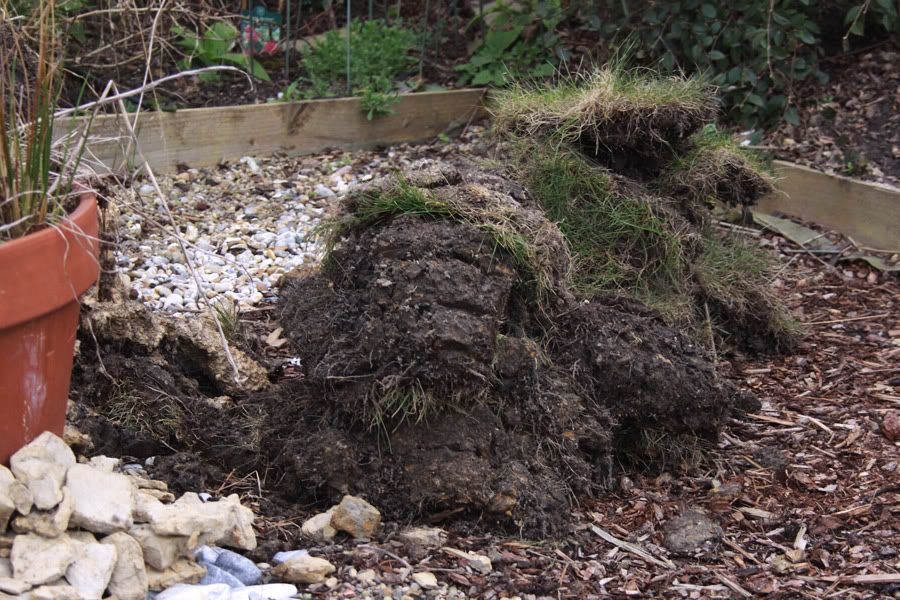
Another mound of turf, this will be moved once I move the compost bin (will empty it onto the border).
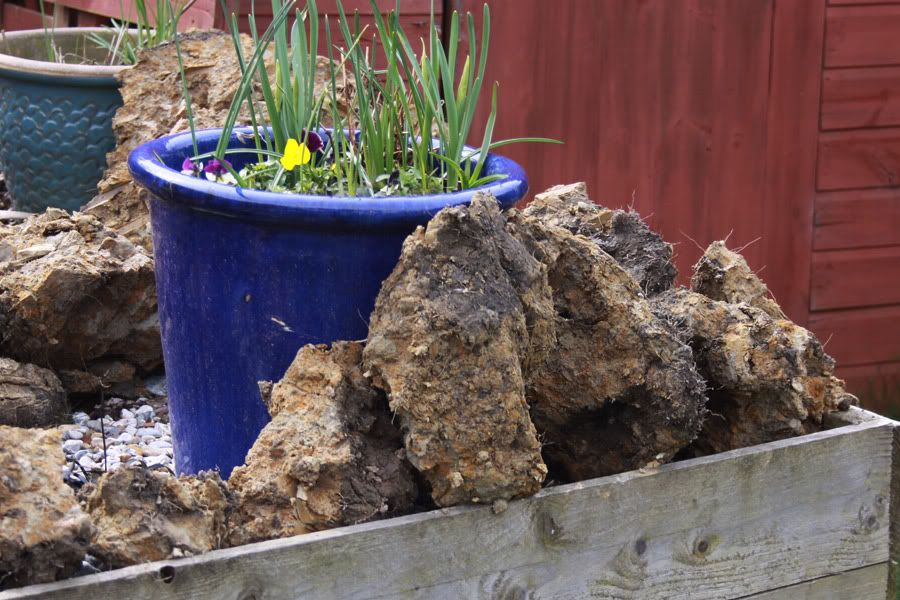
Some of the piles of huge lumps of clay, they’re being left to dry.
After the clay has been cut into smaller lumps.
When I was cutting with the lawn edger I began to feel like I was a pneumatic drill... Up, down, up, down, up, down. *head bobbing away*
lol.
I had ordered quite a few bags of top soil and they finally arrived on the Friday. So as soon I got home I was out emptying everything onto the border...
**Note to myself - it's a bad idea to attempt such physical work after you've been out all day at work. Even worse idea when you haven't eaten for 6 hours.
To add to the top soil we mixed in; sand, home produced compost, the remains from the veggie planter, mulch, soil improver and gravel.
09th April


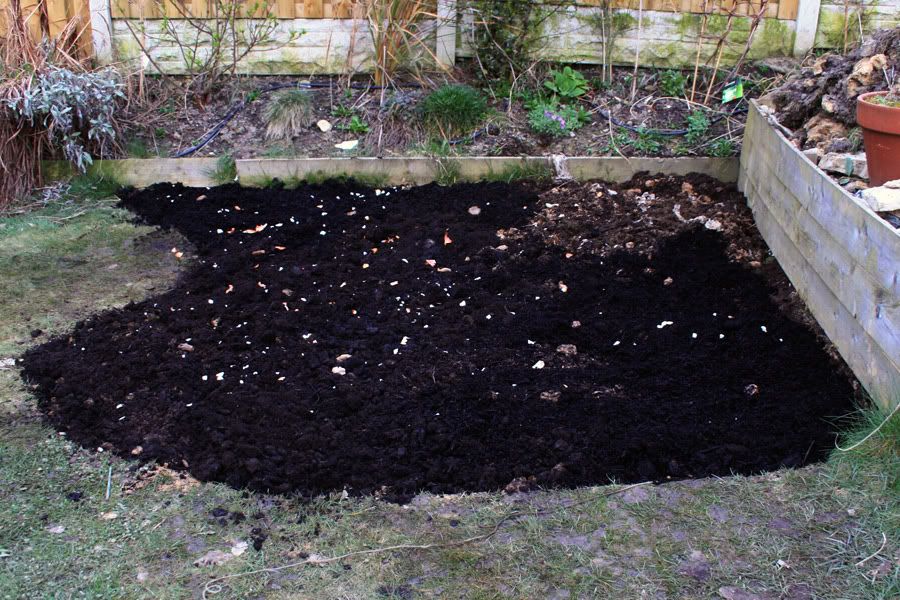
Ignore the white bits, I threw onion out to deter cats taking advantage of the fresh soil.
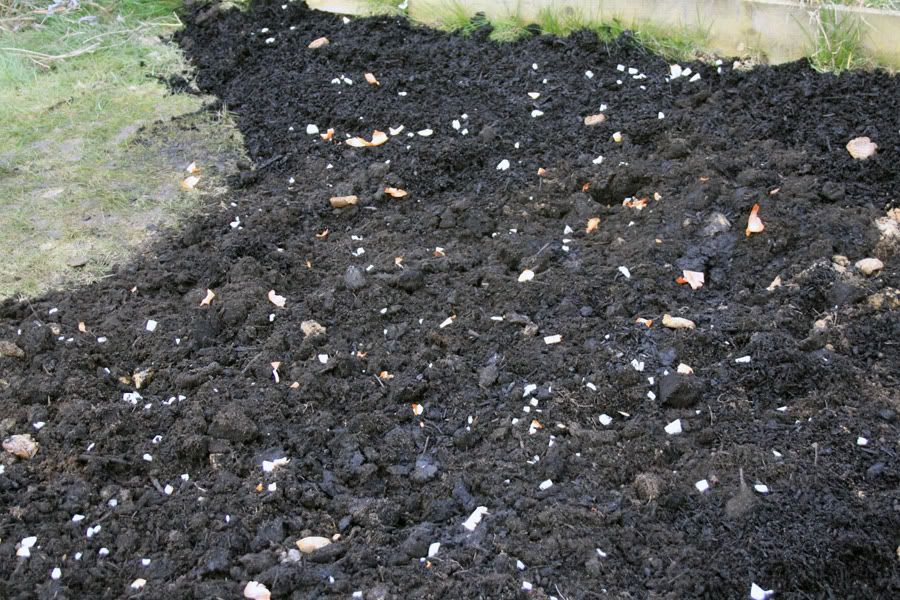
If the clay isn’t improved I might just end my life, now.
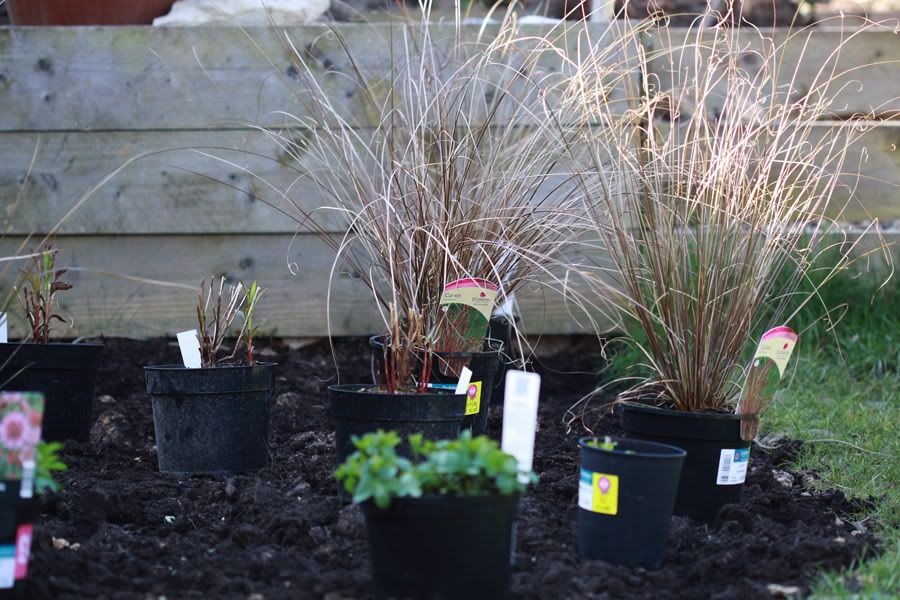
The next hurdle was deciding where the plants should go within the border, trying to imagine the growth of the plants as they mature…
17th April
Plants laid out ready to go in…
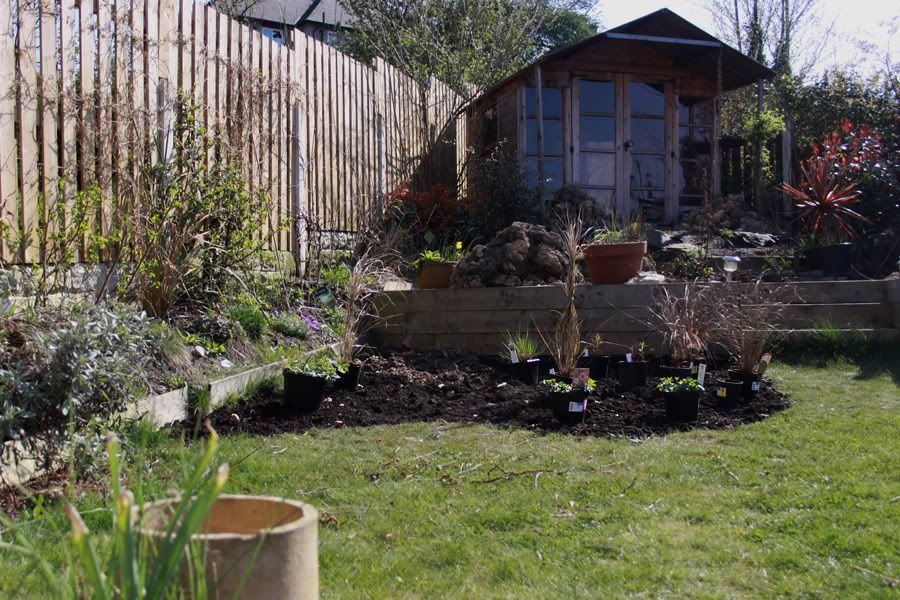
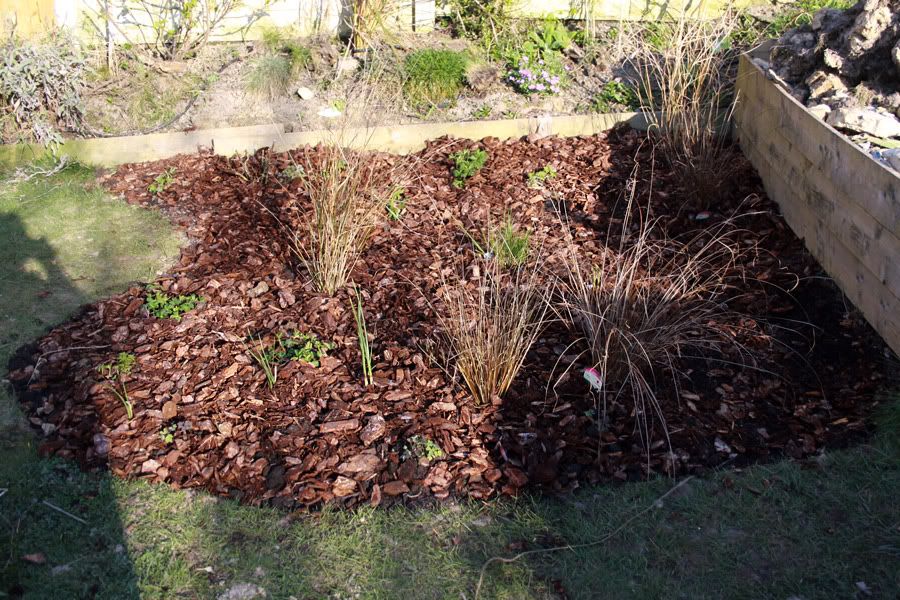
And woo hoo it's done!

It's amazing how suddenly it looks rather empty… Those grasses will get to be 1m though, so I've had to leave room around them.
I'm pretty certain I'll move things around in future, as I understand them better, but for now this will have to do. There are aspects I am not happy with, like the ridiculous wooden border was meant to go; the plan was to raise the new border to meet the old, but as I dug down to get rid of the clay it meant I needed to raise the border even more.
It will have to wait to be rectified, for now I have plans to plant some Aubrietia and Campanula along the edge to hide the wood.
And will you look at this cheeky chappie!

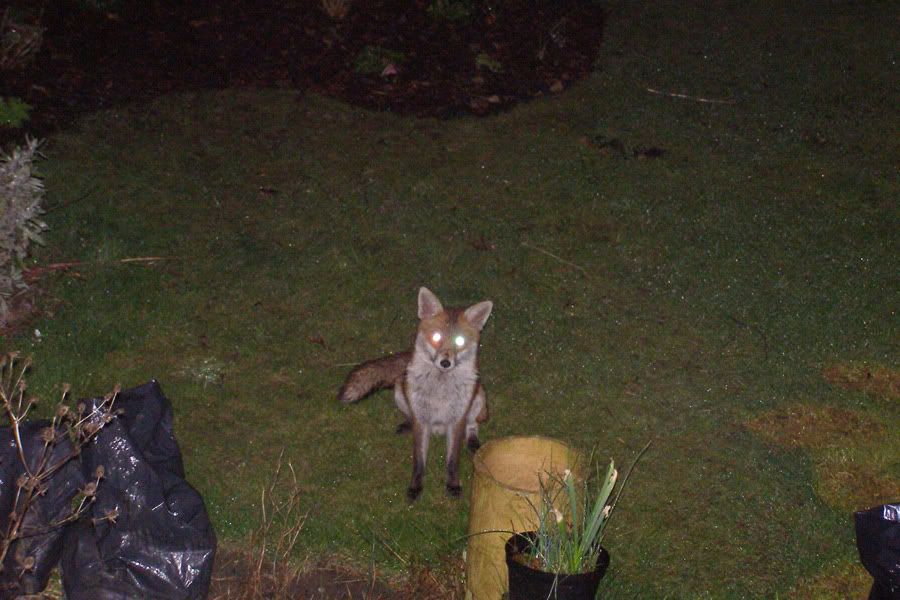
What do we think? Dog or Vixen?
Images were actually taken by my brother… I actually know what the little beggar had been up to, see that pot knocked over at the bottom of the first photo? It’d been trying to plant yet another egg in there for me. I found one buried in the actual border instead and threw it up to the area it’s now stood in the next day.
Phew, now after all that I think I'll go get myself a drink - it is Friday after all!


22 comments:
When I was at school in art we made our own pottery clay using clay dug up from the school grounds - you could try going into pottery. The soil on our plot is pure clay in parts too so I've often been tempted. One good thing is that once clay soil is made workable it is usually very fertile.
I'm exhausted just reading it, I hope you had that drink! I'd be very tempted to try and make something out of some of the clay too.....
That is a true labour of love. In the first few photos, I had that you had broken bricks in the soil.
Well done!
Hi Liz....well done. Making a new border is no easy task. And it gets harder as you get older....
As you see it develope this summer, all those aches and pains will be long forgotten.
Clay....we seem to have very similar soil conditions.
When I made my first border here, the large lumps of clay I removed I broke up and added them slowly to the composter. I put layers of comfrey leaves in now and again. It worked really well and saved me having to dispose of all the clay. Mind you I do have nine composters so it was easy for me, I could leave it there for a while so the job was done properly.....
Can't wait to see your border during the summer months....I suspect you can't either.
Have a lovely weekend, it should be a good one........although being a gardener, I have to say, we do need some rain.
Forgot to say about cute foxy....perhaps to bold for a vixen.
Could I have him please.......I have a lovely little copse waiting for him and a nice supply of breakfast dinner and tea...lol
Our front garden is almost pure clay. Cutting up the clods and drying them hadn't occurred to me, so perhaps this would be a way forward for us to make the land more useable. Thanks for the step by step guide - genuinely very useful pictures.
Hi,
I had considered potter but then assumed you had to do something with the clay first to make it more manageable? This is yellow stuff with stones and such in it… Perhaps I could do with some nice fruit bowls and vases… lol.
Hi Su,
It was the lifting which was the problem, I don’t have much upper body strength so although my feet and legs were fine with the digging – I had difficulty actually lifting and moving the clay!
It’s done now finally, and hopefully I won’t have to do anything else for a long time now…
Yep, famous last words and I think we all know it won’t last long!
Hi Deborah,
We have found broken bricks elsewhere in the ground but this particular area was free of the bricks but did hold plenty of large flat stones which I’ll be using to create a dry wall and plant fleabane, campanula and aubrieta :)
Hi Cheryl,
Did you break the clay into really tiny pieces or were they ok to be left at say, the size of a fist, apple, Clementine etc?
I only have the one compost bin – don’t have enough waste to warrant more so for me, I may only be able to put a very small portion into the compost bin. I could possibly have two bins, but then we’re moving into space issues, but I must admit having a second would be a good idea then you can be using one and producing more in the other.
Yep, rain is definitely welcome here too. I’ve had to water the garden twice this week and suspect I’ll have to do it again tonight too. Although it isn’t as sunny today – hazy but it is still warm. Next week is supposed to see higher temps I hear? 22 I think, which will mean it’ll be more like 30 in our almost full south back garden.
You’re welcome to the Fox, please take them! I’m sure they would have a field day in your copse, although they may appreciate you to also supply eggs since they seem to enjoy them so much here…
Hi Dozenoaks,
Not that I can claim to be remotely knowledgeable on dealing with clay, from what I’ve read it is advised to dig it up, break/cut into smaller pieces and then add sand/grit/compost to it to help add drainage. Then as the worms take in the compost it gradually becomes much more workable.
I’ve also read a recent blog post somewhere, where you simply just add lots of mulch/compost on top of the clay and over time again, the worms take the organic matter down into the soil/clay and break it up. But for me and probably you too, the problem is that in this clay there are no worms! So I’ve done the hard work, and hopefully from now on the worms will continue the good work and we’ll eventually have a very healthy bed.
I am so glad I don't have to deal with clay (I am getting too old for all that back breaking digging) I look forward to seeing your new border when it all fills in with the new plants.
Oh, I will never complain about my clay soil again after seeing yours. That made me exhausted just watching what you had to do. Your bed looks great and I like the shape of it. Have a drink..cheers!
Wow Liz, I’ve been looking forward to reading this but now I feel bad that you have had such a hard job there. Looking good though and I can easily see how it will be after a few months. You’ve earned your gardening badge there :-D
Lol… and like having babies once some time passes I’ve a feeling you will forget the backache and set to work on another border ;-)
I have only once gardened with clay soil at my MIL’s garden (in the rain) and found myself walking around with a new style of platform wellies!!
I have always appreciated my free draining loam soil. I really do know how lucky I am too. I am only finding some suggestion of clay during my pond dig at about 2½ feet down. Sorry, I’ve a feeling you maybe don’t want to hear that right now. Oops..hangs head :-o
Wishing you a great gardening weekend… if your body and spirit is up to it ;-)
Liz I thought my soil was bad until I saw what you have to struggle with -I've never seen the likes of that before - what a backbreaking job that must have been - but just think of all the calories you were burning off doing it.
I too love making new borders but I've run out of space for making them now - the lawn can't get any smaller and normally half way through the job I say to myself why did I start this - but always in my mind I have a picture of what I think its going to look like and that motivates me to keep going.
Have a lovely weekend
Oh my, I've had clay soil in the past, but yours almost looks like broken-up concrete! Not even sure you could make bricks with that. I love how your new bed is coming together, and clearly the neighborhood fox felt it worthy of a personal inspection. Too cute, posing for the camera even!
My goodness, what work..what effort! Can you still stand up or are you forever stooped over in back ache agony. This truly is love. Love for your garden, love for your border. Even the local wildlife loves your new garden. I have never seen such clay soil. I shall NEVER EVER complain again. Congratulations on your fabulous new border. It looks amazing already and please show us progress throughout the year. Its 5.30 pm in Chicago and I'm about to toast your hard work! Have a super relaxed, epsom salt soaked weekend. UDG
Hi Liz. I love the shape of your new bed. It is hard work when you have that old clay. Your dirt looks just like mine. Maybe we could go in the making bricks business LOL!
What an incredible amout of work! Well done! The new bed has such a lovely shape and you did an excellent job of ammending the soil. I also have rediculous clay, and should be making pots while preparing new beds. The layout of plants is so pleasing, they always do look a little sparse when first planted but fill in quickly. The vixen is beautiful! And so very bold.
My back hurts just looking at all that work. Congratulations on hanging in there, taking all the necessary steps and creating something beautiful. And thanks for the tip on the onions to keep the cats away - I will definetly be using that trick. Can't wait to see pictures later on in the year as it fills in.
And now.....to my new border. A small stretch between the patio and the cedar hedge which is about 40' long and 3' wide covered in hard packed grass. it will be a daylily border once my husband gets rid of the grass.
OMG! And you had some energy left to write this post! You deserve a medal! I can feel your pain. Instead of clay, I need to remove rocks when I create a new bed. But you did a great job, Liz!
Your new border will be lovely, and worth all the hard work! Look forward to seeing summer pictures.
Post a Comment